Pages

Sunday, December 23, 2012

Beef Stroganoff

I'm visiting my sister this weekend for Christmas and last night she asked me if I would make my beef stroganoff recipe.  I realized then that I don't think I have ever shared this recipe with all of you.  As I was making my grocery list for what I needed to buy my husband said he was so excited for my stroganoff and that I needed to make it more.  Now I know he's become accustomed to my cooking, but it must be somewhat good for him to say that right??  :)  Anyway here is a recipe for you all and this is what we're having for dinner tonight at our house.
 Classic Beef Stroganoff
Ingredients
1 1/2 lbs. Flank Steak
1 1/2 cups FULL FAT Sour Cream
8 oz. Fresh Mushrooms, sliced
2 Onions thinly sliced or diced (whatever you prefer)
2 Garlic cloves, minced
1 1/2 C. Beef Broth
1/2 tsp. Salt
1 tsp. Worcestershire
1/4 C. Flour
3 C. COOKED Egg Noodles
1 tsp. dried Parsley
1/4 tsp. Pepper
1 tsp. dried Basil

Directions
In a saute pan sear the steak on each side for apx. 2-3 minutes (depending on thickness).  You want it medium rare on the inside. (or cook to your liking).  After it is cooked to where you like, let rest on a cutting board for 8-10 minutes.  Slice across the grain in about 1/2 inch thick slices (you want it to be thin enough to basically melt in your mouth.)

In the saute pan add 3 Tbs. butter and cook onion, garlic, and mushrooms, over medium heat until tender.

Add the beef, salt, and broth and cook for about 1-2 minutes.  Then add the remaining ingredients all but noodles and stir until well mixed, let simmer for about 3 minutes.  Turn off heat and stir in noodles.  Let sit and thicken for about 5 minutes and then serve.

Tuesday, December 18, 2012

Gingerbread Men Cookies

Every Christmas Eve Aunt Jilly brings 2 cookies to the party to frost with the niece's and nephews.  I bring cut out sugar cookies, and gingerbread men cookies.  Then I bring all different types of frosting, in all different colors, and an array of sprinkles.  We have so much fun decorating the cookies for Santa, and then leaving them out with a glass of milk for him to eat when he comes.  It's so fun to see each of the children big and small get into their decorating, and be so proud of what they have done.

My cut out sugar cookie recipe is one of my most popular recipes and you can find it on the side of the blog, but this is the gingerbread men recipe that I use, so you'll have that too in case your family wants to start this tradition if your home.  Happy Holidays!!
Ingredients
3 cups all-purpose flour
¾ cup packed brown sugar
1 tablespoon ground cinnamon
1 tablespoon ground ginger
½ teaspoon ground cloves
½ teaspoon salt
¾ teaspoon baking soda
¾ cup (6 ounces) unsalted butter, cut into 12 pieces and softened slightly
¾ cup molasses
2 tablespoons milk

Directions
In a standing mixer fitted with paddle attachment, stir together flour, sugar, cinnamon, ginger, cloves, salt and baking soda at low speed until combined, about 30 seconds. Stop mixer and add butter pieces; mix at medium-low speed until mixture is sandy and resembles fine meal, about 1½ minutes. Reduce speed to low and, with mixer running, gradually add molasses and milk; mix until dough is evenly moistened, about 20 seconds. Increase speed to medium and mix until thoroughly combined, about 10 seconds.
 
Scrape dough onto work surface; divide in half. Working with one portion of dough at a time, roll ¼-inch thick between two large sheets of parchment paper. Leaving dough sandwiched between parchment layers, stack on cookie sheet and freeze until firm, 15 to 20 minutes. (Alternatively, refrigerate dough 2 hours or overnight.)

Preheat oven to 350 degrees F. Line two cookie sheets with parchment paper.

Remove one dough sheet from freezer; place on work surface. Peel off top parchment sheet and lay it back in place. Flip dough over; peel off and discard second parchment layer. Cut dough into gingerbread people or round cookies, transferring shapes to parchment-line cookie sheets, spacing them ¾-inch apart. Repeat with remaining dough until cookie sheets are full. Bake cookies until set in centers and dough barely retains imprint when touched very gently with fingertip, 8 to 11 minutes, rotating cookie sheet from front to back halfway through baking time. Do not overbake. Cook cookies on sheets 2 minutes, then remove with wide spatula to wire rack; cool to room temperature.

Repeat until all dough is gone.

Once cookies are cool, decorate with royal icing, if desired. or as I do it, just put icing into tip squeeze containers and decorate.  Enjoy!

Monday, December 10, 2012

Homemade Lofthouse Cookies

I had a lady tell me that her son's favorite cookies are Lofthouse cookies from the store, but he has a severe nut allergy so they're no longer able to buy the cookies from the store (they are made in a place that makes things with nuts.)  She was so thrilled when I instagramed a picture of my Lofthouse cookies last night and instantly emailed me and said, "I NEED YOUR RECIPE!!"  It's little things like that, that make coming up with recipes worth while.  I was so excited that I could make a little 9 year old boy happy.  I can't wait to hear all about his reaction when she surprises him this weekend with cookies!

For all of you that love lofthouse cookies, but would like to make your own here it is!!  The Homemade Lofthouse Sugar Cookie "Copycat" Recipe....

Ingredients
1 boxed White Cake mix
1 small Vanilla pudding package
3 Tbs. Sour Cream
1/3 C. Canola Oil
1 tsp. Vanilla
2/3 C. Flour

Directions
Your dough is going to be thick, so don't be surprised. 

Heat your oven to 350 degrees and line a baking sheet with parchment paper.  (YES, you have to use parchment paper or a baking mat for this recipe. It's MANDATORY!)

Roll dough into little balls and place on your baking sheet.  Then take a cup and smash the ball down until it's about 1/2 inch thick. 

Bake in the oven for 10 minutes, no longer; just so they have set up.  Remove from oven and let sit on the baking sheet for 1 min. and then transfer to cooling rack.  You want to make sure you don't cook longer than 10 min. because you don't want the bottom to brown or the top to brown.  The great thing about Lofthouse cookies is that they are soft and white and moist and fluffy, not crisp on the bottom.  The 10 min. will make sure the entire cookie is as soft as the original Lofthouse.

Once the cookie has cooled frost with whatever frosting recipe is your favorite.  If you are going for the Lofthouse frosting you are going to make a simple buttercream.  I like cream cheese frosting, but you choose whatever you like.  Enjoy!

5 Minute Fudge

I love fudge, and when I say that I mean ALL fudge.  I go through so many different fudge recipes around the Holidays it's not even funny.  This one is tried, and true.  It's delicious, and easy, and if you break it up into little chunks and put in those Chinese take out boxes you can give them as neighbor gifts, because let's be honest; who doesn't LOVE fudge?!
Ingredients
1 bag Milk Chocolate Chips
1 bag Butterscotch Chips
1 Can Sweetened Condensed Milk
1 C. Walnuts
1 tsp. Vanilla

Directions
In a heavy bottom pot, dump everything in and place on the stove over medium heat.  Stir constantly until completely melted.  Pour into a pie pan, or a 9x9 baking dish.  Put in your fridge to harden, and then cut into bricks and give as gifts, or eat the whole thing yourself like I do.  :)  Enjoy!

Friday, December 7, 2012

Coconut Macaroons

These are the most delicious and most easy cookie in the world!  If you make them, I promise you'll be hooked.   You should probably double the recipe just to be prepared.

Ingredients
1 14oz can Sweetened Condensed Milk
1 14oz Bag sweetened Flaked Coconut
2 tsp. Vanilla

Directions
Preheat oven to 350 degrees.

Mix all ingredients together in a mixer.  Place pastry paper on a cookie sheet and spoon cookies onto the cookie sheet.

Bake for 10-12 minutes or until the cookies are slightly browned all over.  Cool and eat!

Monday, December 3, 2012

Lazy Sausage Dinner Bake

I was looking in my bare fridge today and not having any desire to go to the grocery store I decided I was going to make due.  In the freezer I had 4 sausage's that I thawed and decided to throw a bunch of veggies and herbs in with them and see how it turned out.  I was lucky because it turned out delicious!!  (Good thing because hubby doesn't like when my "experiments" don't turn out nummy.)  Now that's it's tested and passed, I'll give the recipe to you!  I always wanted to let all of you know that I am working on a cookbook right now!!  This recipe will definitely be in it! Enjoy!

Ingredients
2 tsp. Dried Parsley
2 tsp. Dried Basil
2 tsp. Dried Oregano
1 1/2 C. Chicken Broth
1 tsp. Seasoning Salt
1/4 tsp. Pepper
2 Onions, cubed
1 lb. Potatoes, peeled and diced
5 Large Carrots, peeled and cubed
5 Garlic Cloves, smashed
4 Sausage Links/Bratwursts Pork or Beef
3 Tbs. Olive Oil

Directions
In a saute pan, brown your sausages on every side.  Cut in 1/2 and put into a 9x13 baking dish. Dice your carrots, onions, and potatoes and throw those into the baking dish. Smash and peel your garlic and put those in.

Preheat oven to 450 degrees.

In a mixing bowl combine your broth, herbs and seasonings, and olive oil and whisk together. Pour over the vegetables and sausages.  Cover with Heavy Duty aluminum foil and bake for 30 minutes. Remove and stir and then cover and place back in the oven for another 15 minutes or until the veggies are soft.  Remove and let rest while covered for 10 min. before eating. Enjoy!

Sunday, December 2, 2012

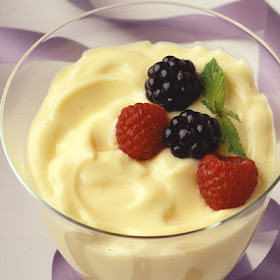
No-Bake Vanilla Custard

 If you need a quick dessert, this is one of my favorites! If you put it with some fresh fruit it makes the perfect after dinner treat!  It's fast, easy, and delicious.  I normally always have everything that I need already at my house, so it's one of those you can make anytime.

Ingredients
1/2 C. Heavy Cream
1 1/2 C. 2% Milk
2 Eggs, beaten
1 tsp. Vanilla
2 Tbs. Cornstarch
1/3 C. Sugar

Directions
Whisk eggs in a bowl until blended and set aside. 

In a saucepan over medium heat bring the milk, sugar, cream, and cornstarch to a steam, whisking constantly. Do not boil, just get it steaming. Take off heat and mix 1/3 C. of the milk mixture and whisk into the eggs to temper the eggs.  Then add the eggs into the milk mixture, and return to heat. Continue to whisk over medium heat until thick (about 3 more minutes) Remove from heat and add vanilla. 

Chill.  Serve with fruit or by itself.

Monday, November 26, 2012

Chocolate Chunk Cookies

I love a good cookie, but for me it has to be the RIGHT cookie.  I personally like my cookies, what I like to call; the 50/50.  I like 50% chewy and 50% thick.  I have a different chocolate chip recipe that is a HUGE hit with people in Utah, but this recipe that I have come up with for me is my personal favorite.  If you like thick, chewy in the middle, and a slight crunch on the outside, try my Buffo's Chocolate Chip cookies click here.

This is the recipe for my Chocolate Chunk Cookies...

Ingredients
2 C. Cake Flour
1 2/3 C. Bread Flour
1 1/4 tsp. Baking Soda
1 1/2 tsp. Baking Powder
1 1/2 tsp. Coarse Salt
2 1/2 sticks unsalted Butter
1 C. Sugar
1 1/4 C. Packed Brown Sugar
2 Eggs
2 1/2 tsp. Vanilla
2-3 Large Hershey Bars

Directions
In a mixer Cream butter and sugar together until creamy and light, about 5 minutes.  

Sift all the dry ingredients together and set aside.

To the butter mixture add the eggs, and vanilla.  Mix until combined.  Slowly add your dry ingredients and mix until well combined.

With a grater, grate 1 hershey bar.  With the 2nd and 1/2 of the 3rd hershey bars, break into pieces and  place in a ziploc bag.  Then get a mallet, rolling pin, whatever you have and beat the heck out of them to break them into pieces.  (This is a great way to get aggression out.)  :) 

Mix the grated chocolate and chocolate chunks into the dough.  Wrap in plastic wrap and refrigerate for about 3 hours.

Preheat oven to 350 degrees.  Place parchment paper on your cookie sheets and scoop cookies onto cookie sheet.  Bake for 8-12 minutes or until lightly browned. Enjoy!!

Andes Mint Cookies

We had a cookie exchange with my friends, and this was one of the cookies that was brought.  It was absolutely to die for, so of course I made my friend give me her recipe and all of you get to benefit from that!  Here is one of the BEST cookies you will give this Christmas!
 Ingredients
1 Devil's Food Cake Mix
1/2 cup oil
2 eggs
1 package of Andes Mints

Directions
Preheat oven to 350 degrees.
Mix cake mix, oil, and eggs together. 

Drop spoonfuls of dough onto baking sheet. 

Bake for 6-9 minutes. Don't cook any longer than that! You don't want them to be overdone!

Take sheet out of oven and while the cookies are still very hot, place an Andes Mint on top of each cookie. In about 5 minutes, the mint will be melted. Take a spoon and smooth out each mint like frosting.  Enjoy!

Thursday, November 15, 2012

Marshmallow Caramel Popcorn

I was craving a treat tonight, and this is what came out of that craving.  It turned out delicious and to die for, and I think all of you are going to love it!  Plus, it's SUPER easy!
Ingredients
2-1/3 cups popcorn kernels
1/2 cup butter
1 3/4 cups brown sugar
4 Tbs. Light Corn Syrup
2 tsp. Vanilla
16-20 Large marshmallows

Directions
In a popcorn popper. pop 1/3 cup of kernels. After the 1st batch, pop the 2nd 1/3 cup of kernels.  Remove any unpopped kernels and set aside.

In a pan over medium heat, melt butter, sugar, and corn syrup.  Add vanilla.  Slowly stir in marshmallows until they melt. Don't let your mixture boil.  

Poor over your popcorn and stir until everything is well coated.  Enjoy!

Midnight Smoothie

 So I woke up up this morning in the middle of the night craving a smoothie, and I must say that the outcome was delicious!  

I was going for strawberry, but my husband had conveniently eaten the strawberries earlier in the day so I used what I had on hand and this is what I came out with....


Ingredients

2 Bananas
3/4 cups Blueberries
1 Blueberry Yogurt
5 Ice Cubes
1/2 cup Vanilla Soy Milk
4 Fuji Apple Slices

Directions
Blend together in your blender until smooth, and enjoy!

Sunday, November 4, 2012

Crock Pot Chicken and Dumplings

 This is the perfect cold weather meal, and it's hearty.  I made it when we got our 1st day of snow here in Utah, and my husband LOVED it!  Chicken and dumplings is the perfect comfort food.  I know your family will love it too!  PLUS, it's EASY; so what's better than  that?!

Ingredients
5 Boneless, skinless, Chicken Thighs
4 Large carrots, peeled, and diced
1 can of corn, drained
1 can of peas, drained
1 can cream of Chicken soup
1 can cream of Celery soup
1 C. Chicken Stock
1 C. Half and Half (you can use milk)
1 Onion, Minced
2 Garlic cloves, minced
1 Package Pillsbury Biscuits
1 Tbs. Rice/Quinoa/Tapioca (your choice)
1 Tbs. Fresh Parsley Chopped
1 Tbs. Fresh Basil Chopped
Salt and Pepper
1 tsp. Chicken Bouillon

Directions
Spray crock pot. Mix your onion and garlic together and lay on the bottom of the crock pot.  Lay the chicken on top of that. Sprinkle your seasonings on top of the chicken. Then layer over your corn, peas, and carrots.

In a mixing bowl, combine your soups, chicken stock, bouillon, and half and half.  Pour over the entire dish in your crock pot.  Turn on low for 4-6 hours. At hour 3 mix in your Tbs. of Rice to thicken your stew/soup.

When the chicken is cooked thoroughly (it depends if you put your chicken in frozen or thawed) shred chicken, and turn your crock pot on high. Take your biscuits, rip into 1 inch chunks, and layer on top of your soup.  Let cook on high for 1 hour or until the biscuits are fully cooked.  Serve, and enjoy!

Tuesday, October 23, 2012

Quick and Easy Cinnamon Rolls

I experimented yesterday with some Rhodes Rolls.  I was craving cinnamon rolls, but didn't have 6 hours to devote to my regular recipe.  My experiment turned out Delicious!  Now, I will say they weren't as amazing as my regular recipe, but when you don't have all day, these are a great alternative!  
Ingredients
12 Rhodes Rolls
Brown Sugar
1 Cube Butter, melted
Sugar
Cinnamon Flour

Directions
Let your rolls thaw until they are pliable.  Squish 2 together and pat them in flour. Melt your butter in a bowl.

On a floured surface, roll 2 of the rolls into a disk.  I make mine about 6in in diameter.

With a pastry brush, brush on the melted butter to the disk.  Pat on brown sugar to cover the butter.  Get every inch of the disk on one side.  Then sprinkle a tiny bit of sugar on top of the brown sugar, and top with a tiny pinch of cinnamon sprinkled over the whole thing.

Roll up the disk and squish together a bit so it stands about 2 inches in height.  Brush some melted butter on top and then sprinkle brown sugar on top of that.

Place the rolls in a greased 9x13 baking dish, and cover with a paper towel.  You will have 6 rolls in total.  Let stand until they double, or triple in size.  I like my rolls to completely cover the bottom of the baking dish.

When they have risen, heat oven to 350 degrees and bake for 20-25 minutes or until they are golden brown.  Remove and let cool before frosting, or frost immediately.  Enjoy! 

Monday, October 22, 2012

Old Fashioned Dots

Picture by Living
I love Halloween!  I love having the little kids come knock at my door and trick o treat.  I love to see their costumes, and their faces as they dig through my bowl for candy.  It is one of my most favorite nights of the year.  I like to have something extra special for my treater's that I know personally.  This is one of my go-to recipes for the special little kids that I love and adore. This treat was one of my favorite's growing up, and it never seems to fail to be my little kids favorite too!


Ingredients
1lb. Powdered Sugar
5 Tbs. Meringue Powder
1/2 cup Water
Yellow and Red Food Coloring, for Halloween colors. You can use any that you like though.

Directions
Line a baking sheet with 10x13 inch freezer paper strips.  I like to tape mine onto the baking sheet so they don't slip.

Beat together sugar, meringue powder, and water, with a mixer.  (Test a little bit with a toothpick on the freezer paper to make sure that the icing forms a domed dot, and doesn't spread.  If it forms a peak it's too thick and you need to add a tiny bit more water 1/2 tsp. at a time.  If it's too runny you need to ass more sugar 1 tsp. at a time.)

Divide icing into 3 bowls.  Mix your red and yellow to get orange, then do one yellow, and one white. (Like I said in the ingredients though, you can do any colors you like.)
Put the icing into piping bags and squeeze into the corner (I just use Ziploc baggies and cut off the corner of one side).

Pipe dots 3 to a line onto your freezer paper.  (I normally draw straight lines horizontally all the way down the freezer paper so I know how to line up the dots.  Then I just erase after the dots have dried. You can also find templates for this online.)  Alternate the colors all the way down so you have equal Yellow, Orange, and White.  (I like to make mine look like the candy corn).

Let stand uncovered until the dots are firm and hard.  It normally will take anywhere from 24-48 hours, so do this in advance before Halloween.  Then pop off and enjoy!!

Wednesday, October 10, 2012

Banana Cream Cake with Brown Butter, Brown Sugar Icing

If you like Texas chocolate sheet cake, you are going to DIE over this cake!  If you like bananas, you're going to die and go to heaven!

Ingredients
3 1/2 Bananas, mashed
3/4 C. Sour Cream
2 eggs
1/2 C. Butter, softened
1 C. Sugar
2 C. Flour
2 tsp. Vanilla
3/4 tsp. Salt
1 tsp. Baking Soda
Icing
1 C. Brown Sugar
3 C. Powdered Sugar
1/2 C. Melted butter slightly browned in pan
3 Tbs. Milk
2 tsp. Vanilla

Directions
Pre-heat oven to 375
In a mixer mash bananas.  Add the sugar, vanilla, butter and eggs.  Mix well.  Slowly add the remaining ingredients until smooth.
Grease a 10x15 jelly roll pan, and pour the mixture into the pan.
Bake for 20-25 minutes or until slightly browned.
Set aside while you make the icing.

In a pan heat butter on the stove until melted and it gets slightly brown.  Turn off heat and add the brown sugar, stir for 30 seconds.
In a mixer, combine the butter, brown sugar mixture to the remaining icing ingredients and mix until smooth.

Take a straw and poke holes in your cake all over.  Then spread your warm icing over your warm cake and let sit for about 30 minutes before cutting into.

AMAZING!  I hope you enjoy!

Friday, September 28, 2012

Jilly's Mashed Potatoes

I have been asked over and over how I make my mashed potatoes.  They are creamy, rich, and delicious. I'm always flattered when I get asked this question because I genuinely take pride in my mashed potatoes.  :)  Growing up I spent a lot of time with my Aunt Jan.  She and I have a lot in common, but the main thing we share is our love and passion for food.  She was the one who taught me how to make the worlds best mashed potatoes.  I'm going to share my secrets (although I'm sure a lot of you already do them).  Once you know the main ingredients, you can mix it up and add fun flavorings to get a HUGE variety of different kinds.  
Ingredients
6 Russet Potatoes, peeled and cubed
1 cube of unsalted butter
1/2-1 C. Heavy Cream
Dash of Salt

Directions
Bring a big pot of water to a boil. Salt your water, and add your cubed potatoes to the water.  Let boil until you can insert a fork into the potato easily.  Drain the potatoes.

Put your cooked potato cubes into a mixer.  Add your butter (I like to use room temp. so it melts and mixes quickly), and salt.  Mix until the potatoes start to break up and then slowly start to pour in your cream about 1/4 cup at a time.  Mix until your potatoes are completely smooth (lump free) and are stiff enough that they hold a form.  (The reason you add your cream so slowly is because you don't want to make them liquidy.)  

Once they get to the consistency that you like, this is when you can add any flavorings.  You can add garlic, sour cream, parsley, or anything else.  If I make a beef roast on Sunday I normally just make the plain mashed because I use gravy on top.  If I am serving them with a pork roast though, I will make garlic mashed with a little parsley mixed in.  It's up to you.

Wednesday, September 26, 2012

Homemade Fruit Roll-Ups

I saw this recipe on pinterest from loveyoumadly.com. I was so excited about it, that I had to share it on my page! I tried it, and it's amazing! This girl is brilliant, and I'm so glad she shared. Here you go...


100% Real Fruit Roll-Ups

This recipe is pretty flexible. You have the freedom to pick one fruit or mix different kinds. You can use fresh, frozen and dried fruit. Below the recipe are some fruit combination suggestions, but feel free to try out your own combos too. I suggest making a few different trays of fruit at the same time because these won’t last long in your house and though they are VERY simple to make, they do take a long time to set.

1. Warm the fruit in a pot on the stove and mix it into a puree. If there are seeds in the puree you can pour it into a sieve to get the seeds out (I didn’t).
2. Spread the puree on a oil-sprayed silpat baking mat (my baking love!) or parchment paper (BE SURE to spray! If you don’t it will stick!). 1 1/2 cup of fruit puree is enough for 1 baking sheet, and put in the oven on 140°F (or as low as your oven can go. my stove’s lowest temperature is 170). Leave the oven door open a little bit to let the moisture out.
3. They are done when the puree isn’t sticky anymore, you normally need between 5-8 hours depending on the oven and your fruit choices. (If you live in a warm climate, you can just leave the pan in the sun for the day).
4. Use a sharp knife or pizza cutter to cut them and roll them with wax or parchment paper when they are still warm. Enjoy this healthy alternative.

Fruit combination ideas:
Yellow: 1 fresh mango, 200 g dried apricots, 1 orange (the juice) (these came out the best in my opinion!)
Purple: Frozen raspberries, frozen blackberries and 1 banana (these were very seedy, you could replace the raspberries with blueberries)
Green: Kiwi, mango and mint leaves
Blue: Blueberries and grape juice
Red: Strawberries and banana
You can also add spices such as cinnamon, cardamom, vanilla pods or mint leaves.

Thursday, September 13, 2012

Cranberry Cake with Butter Sauce

 I wish I could take credit for this recipe, but I just can't. This recipe is very dear to me because every time I make it, it reminds me of the most special man in my life. This is my Dad's, famous, Cranberry Dessert Cake with the finger licking good, Butter sauce. Oh my goodness it is to die for. My Dad makes this cake on 3 occasions: Thanksgiving, Christmas, and New Years. Other than that, I'm on my own. Now I follow the recipe and can have it anytime, but mine doesn't even compare to the deliciousness of my Father's. So, I thought all of you should be able to enjoy what I have enjoyed for all of these years. The most delectable, delicious, an delightful dessert you will ever find!  

Ingredients 
2 3/4 C. Flour 
2 1/4 C. Sugar 
2 tsp. Baking Powder 
1 tsp. Baking Soda 
1/4 tsp. Salt 
2 C. Sour Cream 
1/2 C. Milk 
1/4 C. Oil 
1/2 tsp. Almond extract 
2 Eggs 
3 1/2 C. Fresh Cranberries 
1/2 C. Butter 
1/2 C. Heavy Whipping Cream 
1 tsp. Vanilla  

Directions 
Preheat oven to 375 degrees. 
Grease a 9x13 baking dish. 
Combine dry ingredients and mix well. In a mixer combine sour cream, milk, oil, almond extract, and eggs. Beat well. Slowly incorporate the dry ingredients into the egg mixture until creamy and smooth. 
Fold in cranberries until just mixed through. 
Pour into the baking dish and bake for 45-55 minutes, or until the toothpick comes out clean. 

While the cake is baking make the buttery glaze. 
In a small saucepan combine the butter, and cream. Bring to a boil and stir constantly for 2 minutes. Remove from heat for 5 minutes and stir in the vanilla. 

To prepare, cut a square of warm cake from the baking dish, place on a plate, and drizzle with the warm butter sauce. I am not kidding, this cake is the most delicious and decadent cake you will ever eat!! Enjoy!

Saturday, September 8, 2012

Tomato Basil and 3 Cheese Baked Pasta

 I have been having a hard time eating meat lately due to a lot of medical issues I have with my stomach.  I still want a hearty dish to fill me up just like everyone else, so yesterday I decided to make a vegetarian pasta dish, and make it just as hearty as any meat pasta dish.  What I ended up with was a delicious, and filling.  My husband loved it just as much, and didn't even mind that there wasn't any meat.  I hope you enjoy it as much as we did!

Ingredients
1 lb. Rigatoni (or any similar pasta)
28oz. Diced tomatoes with sauce
14oz. Tomato Sauce
8oz. Tomato Paste
2 1/2 tsp. Dried Basil
2 1/2 tsp. Dried Oregano
2 1/2 tsp. Dried Basil
1 small can of Mushrooms, drained
1/4 tsp. Pepper
1/8 tsp. Salt
1 Tbs. Olive Oil
1/2 Onion, diced
2 cloves Garlic, minced
1 cup Ricotta Cheese (or cottage cheese)
1 cup shredded Parmesan
1 cup shredded Mozzarella

Directions
In a big pot pour in your oil and cook your onion and garlic until fragrant.  Pour in your Tomatoes, tomato sauce, 2 tsp. of each seasoning, mushrooms, and salt and pepper.  Slowly work in your tomato paste until smooth.  Once everything is combined and it is hot, turn to simmer and let sit while you cook your pasta.

Cook your pasta according to package directions.  When you put your water on the stove, turn your oven to 350 degrees F. Reserve 1/2 cup of your starchy pasta water when you drain your cooked pasta.

While your water is heating mix all 3 cheeses, and the remaining 1/2 tsp. of each of your dried seasoning together.  Mix until combined and then sit aside.

Once you have cooked and drained your pasta, put back into the hot pot, and mix with cheeses and pasta water until the pasta is well coated with cheese.  

Dump your pasta into a greased 9x13 baking dish, and dump the tomato sauce on top.  Sprinkle with a little cheese if desired and toss in your oven for 15 minutes.  Remove from oven, let sit for about 10 minutes and then serve with my garlic bread recipe.  Enjoy!

Tuesday, September 4, 2012

American Alfredo Sauce

I was looking at recipes for Alfredo sauce online tonight, and just wasn't finding anything that spoke to me.  Doing what I do, I decided to come up with my own and see if it works. The response was awesome! 
"The Best Alfredo Sauce I have EVER had!" 
"I'll eat these leftovers any day of the week!"
I was pretty excited to say the least.  What was my secret?  Well, that is where we get the "American" title from.  I used Sharp Cheddar cheese, along with a lot of other stuff, but that was my surprising ingredient.  Here's the recipe, and we'll see if your family likes it as much as mine, and my cute 18 year old neighbor girls next door.  Enjoy!

Ingredients
1 Pint Heavy Cream
1/4 cup Half and Half
1 Tbs. Butter
1 tsp. Minced Garlic
1 tsp. Dried Parsley
1 tsp. Dried Oregano
1/4 tsp. Pepper
1/8 tsp. Salt
2 Tbs. Flour
1/2 lb. Grated Parmesan
5-1 inch cubes of Sharp Cheddar Cheese


Directions
In a pot melt butter with flour and garlic. Heat just until melted.

Add your cream and half and half. Stir until steaming. Add your seasonings, and then slowly mix in your cheese until completely melted. 

Turn onto simmer and continue to stir occasionally for 30 minutes. 

When you drop your pasta, turn your heat on your sauce completely off and just let sit so it thickens up without heat.

I served mine with grilled chicken breast tenders. I cooked the pasta, and then added the chicken to the pasta once I drained the pasta and then drizzled the sauce over all of it and mixed until it got to the consistency that I wanted.  Enjoy!

Saturday, August 25, 2012

Sugar Cookie Bars

I've noticed a lot of sugar cookie bar recipes, but they make a huge amount.  Since I am always just baking for my husband and me, I came up with my own recipe in a small size.  Instead of a cookie sheet pan, this fits in a 9x13 baking dish.  Perfect for just a few.

Ingredients
1/2 C. Butter
1 C. Sugar
2 Eggs
2 tsp. Vanilla
2 1/2 C. Flour
1/2 tsp. Salt
1/4 tsp. Baking Soda


Directions
Preheat oven to 375 degrees.
In a mixer cream butter, sugar, and vanilla.  Beat eggs, and add. Mix well.  Slowly add your dry ingredients until well incorporated.
Line a 9x13 baking dish with parchment paper and spread out your dough so it's about 1/4 inch thick.
Bake for 10-15 minutes or until the top is very lightly golden.  Let cool and frost.

Cream Cheese Icing
1/2 C. Butter
4oz. Cream Cheese
1 tsp. Vanilla
Pinch of Salt
2-4 C. Powdered Sugar
1/2 Tbsp. Milk


Mix all ingredients together until creamy.  Add food coloring if desired.

Tuesday, August 21, 2012

Bacon Egg and Cheese filled cups

Can I just say first off that I am not a bacon fan.  My husband is though, so that's why I experimented with this little recipe.  I am more of a sausage girl myself, but every once in awhile I will cross the white line and try a really crispy piece of bacon.  This recipe is that white line.  

School has started again and I needed a recipe to make for breakfast that can cook while my husband is in the shower getting ready and then he can take it with him on the walk to school (I know, we're such multitaskers in this family).  

I couldn't think of anything other than toast with egg, but that just didn't tickle my creative fancy, so the Bacon Egg and Cheese filled cup was created!  (I'm tapping myself on the back right now as I know you are applauding my success.)

I promise you, this one is a winner and the whole family is going to LOVE you, once you make it for them.

Ingredients
12 strips of THICK Bacon, cut in 1/2 width-wise
6 Eggs
12 tsp. Sharp Cheddar Cheese, shredded
Salt and Pepper to taste

Directions
Preheat oven to 350 degrees, then pull out your trusty muffin pan.  (The one with 12 holes).
Spray your muffin pan with non stick cooking spray.

Then you are going to line outer edge of each cup with 1/2 a slice of Bacon until the entire cup is surrounded.

In a little bowl combine 1 egg, a dash of pepper, and 2 tsp. cheddar cheese.  Beat for just a few seconds until well combined.

Slowly pour 1/2 the mixture into a cup, and the remaining 1/2 in another cup.  (You can always use 1 egg per cup, I just chose to 1/2 them.)
Sprinkle the top with a little salt and pepper and place in the oven for 15-20 minutes.

When you can see that the top of the bacon is sizzling, and the egg is cooked, turn the broiler on high for 1-2 minutes.  You want the egg and bacon to be crispy.


Pull out of the oven, let sit for just a minute, and then scoop them out and send them out the door with those hungry tummy's.

Thursday, August 16, 2012

Olive Garden Zuppa Toscana Knock Off

Hey everybody!  It has been awhile since I've posted and I'm SOOOO sorry about that.  I have been moving this past month into a new home and haven't been doing much cooking lately.  I finally got things settled this week and was able to make my first homemade meal in my new house, and I think I came up with a pretty good soup you are all going to love!


If you have ever had the soup, salad, and bread sticks, at Olive Garden, I'm sure you have tried their Zuppa Toscana soup.  It is by far my favorite, and for years I have wanted to try to make it.  Being that a lot of my pans were packed up and I only had my soup pot, I thought it was a great time to try.  This soup is their creamy, sausage and potato soup.  It's the perfect winter soup, but considering I love soup all the time; I could eat this on a 90 degree day.  Anyway, here is my version of the Olive Garden's amazing soup.  I hope you all like it!

Ingredients
1 lb. ground Mild Italian Sausage
3 Russet Potatoes, scrubbed and cubed
1 Onion, chopped
1/2 lb. Bacon, cooked, drained, and chopped
3 cloves Garlic, minced
2-3 cups Swiss Chard, chopped
28 oz. Chicken Broth
1 quart Water
1 cup Heavy Whipping Cream
1 tsp. Chicken Boullion
1 tsp. Oregano
1 tsp. Basil
1 tsp. Parsley
1/4 tsp. Pepper

Directions
In a skillet cook your sausage. Remove sausage and in the drippings cook your garlic and onion until translucent, drain and set aside.
In a pot combine your chicken broth, water, chicken boullion, spices, potatoes, and cream.  Let cook for about 20 minutes on medium heat.  Add in remaining ingredients, except swiss chard.  Simmer on medium to low heat until potatoes are soft. About 30-45 minutes 
Once the potatoes are soft, add the swiss chard and let simmer for 30 minutes. Taste, and add more salt and pepper if needed.
Serve with some thick, crusty bread, and your set.  Enjoy!

Sunday, July 29, 2012

Strawberry and Cream Cheese Pie

 I have never made a Strawberry pie until last night.  I finally decided that I was going to tempt fate and try the recipe that I had come up with in my head.  I'm happy to say that it turned out AMAZING!  If you like creamy fruit pies, you will love this pie.

Ingredients
1 Pie Crust, baked and cooled
1 lb. Strawberries, sliced
1 pkg. Strawberry Danish Dessert
1 pkg. Cream Cheese
6-8oz. Sour Cream
2/3 cup Sugar

Directions
Make your Danish dessert according to pkg. instructions. Set aside to let cool while you cut your strawberries.  Mix the strawberries and danish dessert together.
In a mixing bowl, mix cream cheese, sour cream, and sugar together.
On the bottom of your cooled pie crust, layer 1/2 of the cream cheese mixture.  On top of the cream cheese mixture layer all your strawberry mixture.
Refrigerate to set up for 2 hours or more.  Enjoy!

Saturday, July 28, 2012

Apple Pie Dump Cake

 I saw a recipe like this on pinterest, and decided to step it up a little bit.  I love a good apple cobbler/cake so when I saw this recipe, I just saw a few things that I thought were missing and decided to come up with my own recipe.  So here is your Stepped Up Apple Dump Cake.

Ingredients
2 cans Apple Pie Filling
2 Tbs. Cinnamon
1 tsp. Nutmeg
1 Yellow Cake mix
1/2 cup Quick Cooking Oats
1/2 Cup Pecans, Chopped
2 cubes Butter, sliced into Tbs. portions

Directions
Preheat oven to 375 degrees.
Grease a 9x13 baking dish. Dump in Apple Pie Filling.  Sprinkle your cinnamon and nutmeg on top.  Mix your cake, oats, and pecans, together and sprinkle over the Apple pie filling.  Evenly place your slices of butter all over the top of your mixture.
Place in the oven and bake for 45 minutes.
Serve with a scoop of Vanilla Bean Ice Cream. Yum!

Friday, July 27, 2012

Banana Bread in a Jar

 So I'm obsessed with jar baking lately because you can just make it so cute!  So here is my fun little banana bread recipe in 3 pint size jars.  Remember, you can put them in smaller to get more.  I only needed 3 Thank You's so that's why I did Pint size.

Ingredients
3 ripe Bananas, mashed
1/2 tsp. Baking Soda
1 C. Sugar
1 1/2 C. Flour
1 cube Butter, melted
1 Egg, beaten
Dash of Salt
3 Pint Size Mason Jars


Directions
Preheat oven to 325 degrees.
In a mixer, mash bananas until smooth and creamy.  Add in flour, sugar, baking soda, salt and egg.  Mix well.
Mix in butter until smooth and a little runny.
Slowly pour into 3 pint size wide mouth mason jars.  Fill Each jar 3/4 of the way full.
Place 3 jars on middle rack in oven, on the lower rack fill a cookie sheet with about 1/2 inch of water.
Bake for 45-55 minutes, until brown on top.
Remove, and cool on rack until completely cool.
Screw on lid and then cut a fun piece of fabric and tie over the top with twine.  Give as gifts!