Showing posts with label Cakes. Show all posts

Tuesday, January 29, 2013

Best Brownies

As I was baking my brownies today, I realized that I had never share my recipe on the blog.  WHAT?!  How could I have done this?  I mean everyone needs to know how to make brownies.  It should be a law.  So today I am going to share my favorite and most delicious brownie of all time recipe (at least in my opinion).
Ingredients
2 Sticks of Butter
1/3 C. Cocoa
2 C. Flour
2 C. Sugar
4 Eggs
4 tsp. Vanilla

Directions
Preheat oven to 350 degrees.
Over medium heat, melt the butter and cocoa until smooth.  Pour into a mixer and add the eggs, vanilla, and sugar.  Mix until creamy, and add the flour.  Mix until well incorporated, and do not over stir.

Line a 9x13 baking dish with parchment paper and pour the batter into the dish.  Bake for 20-25 minutes until a toothpick comes out clean.

Let cool for 10 minutes and then frost.

Frosting Recipe
Ingredients
1 cube butter
1/3-1/4 C. milk
3-3 1/2 C. Powdered Sugar
1 tsp. Vanilla
1/4 C. Cocoa
Pinch of Sea Salt

Mix all together until it's the consistency that you would like.  (If you want it more runny add 3 C. Powdered Sugar, for firming add 3 1/2 C.)

Pour over warmed brownies and let harden just a bit.

I serve with Vanilla Ice Cream.  Enjoy!!

Wednesday, October 10, 2012

Banana Cream Cake with Brown Butter, Brown Sugar Icing

If you like Texas chocolate sheet cake, you are going to DIE over this cake!  If you like bananas, you're going to die and go to heaven!

Ingredients
3 1/2 Bananas, mashed
3/4 C. Sour Cream
2 eggs
1/2 C. Butter, softened
1 C. Sugar
2 C. Flour
2 tsp. Vanilla
3/4 tsp. Salt
1 tsp. Baking Soda
Icing
1 C. Brown Sugar
3 C. Powdered Sugar
1/2 C. Melted butter slightly browned in pan
3 Tbs. Milk
2 tsp. Vanilla

Directions
Pre-heat oven to 375
In a mixer mash bananas.  Add the sugar, vanilla, butter and eggs.  Mix well.  Slowly add the remaining ingredients until smooth.
Grease a 10x15 jelly roll pan, and pour the mixture into the pan.
Bake for 20-25 minutes or until slightly browned.
Set aside while you make the icing.

In a pan heat butter on the stove until melted and it gets slightly brown.  Turn off heat and add the brown sugar, stir for 30 seconds.
In a mixer, combine the butter, brown sugar mixture to the remaining icing ingredients and mix until smooth.

Take a straw and poke holes in your cake all over.  Then spread your warm icing over your warm cake and let sit for about 30 minutes before cutting into.

AMAZING!  I hope you enjoy!

Thursday, September 13, 2012

Cranberry Cake with Butter Sauce

 I wish I could take credit for this recipe, but I just can't. This recipe is very dear to me because every time I make it, it reminds me of the most special man in my life. This is my Dad's, famous, Cranberry Dessert Cake with the finger licking good, Butter sauce. Oh my goodness it is to die for. My Dad makes this cake on 3 occasions: Thanksgiving, Christmas, and New Years. Other than that, I'm on my own. Now I follow the recipe and can have it anytime, but mine doesn't even compare to the deliciousness of my Father's. So, I thought all of you should be able to enjoy what I have enjoyed for all of these years. The most delectable, delicious, an delightful dessert you will ever find!  

Ingredients 
2 3/4 C. Flour 
2 1/4 C. Sugar 
2 tsp. Baking Powder 
1 tsp. Baking Soda 
1/4 tsp. Salt 
2 C. Sour Cream 
1/2 C. Milk 
1/4 C. Oil 
1/2 tsp. Almond extract 
2 Eggs 
3 1/2 C. Fresh Cranberries 
1/2 C. Butter 
1/2 C. Heavy Whipping Cream 
1 tsp. Vanilla  

Directions 
Preheat oven to 375 degrees. 
Grease a 9x13 baking dish. 
Combine dry ingredients and mix well. In a mixer combine sour cream, milk, oil, almond extract, and eggs. Beat well. Slowly incorporate the dry ingredients into the egg mixture until creamy and smooth. 
Fold in cranberries until just mixed through. 
Pour into the baking dish and bake for 45-55 minutes, or until the toothpick comes out clean. 

While the cake is baking make the buttery glaze. 
In a small saucepan combine the butter, and cream. Bring to a boil and stir constantly for 2 minutes. Remove from heat for 5 minutes and stir in the vanilla. 

To prepare, cut a square of warm cake from the baking dish, place on a plate, and drizzle with the warm butter sauce. I am not kidding, this cake is the most delicious and decadent cake you will ever eat!! Enjoy!

Saturday, July 28, 2012

Apple Pie Dump Cake

 I saw a recipe like this on pinterest, and decided to step it up a little bit.  I love a good apple cobbler/cake so when I saw this recipe, I just saw a few things that I thought were missing and decided to come up with my own recipe.  So here is your Stepped Up Apple Dump Cake.

Ingredients
2 cans Apple Pie Filling
2 Tbs. Cinnamon
1 tsp. Nutmeg
1 Yellow Cake mix
1/2 cup Quick Cooking Oats
1/2 Cup Pecans, Chopped
2 cubes Butter, sliced into Tbs. portions

Directions
Preheat oven to 375 degrees.
Grease a 9x13 baking dish. Dump in Apple Pie Filling.  Sprinkle your cinnamon and nutmeg on top.  Mix your cake, oats, and pecans, together and sprinkle over the Apple pie filling.  Evenly place your slices of butter all over the top of your mixture.
Place in the oven and bake for 45 minutes.
Serve with a scoop of Vanilla Bean Ice Cream. Yum!

Tuesday, March 13, 2012

Chocolate Oreo Dream Cake

 Yesterday was my nephews Birthday so my sister and I set out to make the best Birthday cake on the planet.  I must say, we did it!  This cake is so easy and to die for!  I always love using boxed cake mixes but just stepping it up a bit so they taste delicious, so here's the amazing recipe.
From Real Mom (because I ate it before we got a picture)


For the Cake
1 Boxed chocolate cake
1 cup Vegetable oil
1 cup Full Fat Sour Cream
4 beaten Eggs
1 tsp. Vanilla
1 Jello chocolate pudding package

For the Filling
8 oz. Cream Cheese, softened
1/2 cup Sugar
2 cups Cool Whip
12 Oreos roughly chopped

For the Icing
1/3 cup. Cocoa
6 Tbs. Butter, softened
1 1/2 tsp. Vanilla
5-6 Tbs. Milk
4 1/2 cups Powdered Sugar


Directions
Preheat oven to 350

For the cake, combine everything and mix with a hand mixer until creamy. (Beat the eggs just a bit with a fork before you mix them in)  The batter will be thick.   Coat 2 round 9 in baking pans with parchment paper and spoon the thick mix into the pans.   Bake in the oven for 30-40 min.  I checked mine with a toothpick after 33 minutes and it was finished.  Just watch yours really close.

When they are done remove from oven and place pans on a cooling rack.  After 10 minutes hold the sides of the pastry paper and remove the cakes from the pans.  Let sit on cooling rack until completely cooled.

For the filling mix the cream cheese and sugar together with a hand mixer until smooth.  Then add everything else in and mix until well combined.  (I stick my oreos in a plastic bag and hit it with my wooden rolling pin to get the easy oreo bits).  I normally finish by mixing with a wooden spoon so everything is pressed out and all the chunks from the cream cheese are smooth.  You want every inch to have oreo bits.  You are going to put this in the middle of your 2 chocolate cakes, so now it's time to prepare your cakes.

Take the first cake while it's sitting up and cover the top of the cake with the oreo cream.  Spread it around to cover the whole cake.  Take your 2nd cake, turn it upside and place on top of the cream.  Continue to spread the cream around so you can't see any spaces through one side of the cake to the other.  Once your cake is smooth and the cream has filled your cake it's time to make the frosting.

For the frosting put everything in a bowl and mix with a hand mixer until it gets to your desired consistency.  I normally add 1 Tbs. of milk at a time so it doesn't get to runny.  Don't worry if it does though, because you can thicken it by just adding a but more powdered sugar.  When you get the chocolatey taste and consistency that you want, you are going to frost your entire cake.  Let is sit in the fridge for about 1 hour before serving and you're done.

I promise you will be the Mom of the century!!!  This is the most amazing cake, and just adding those few extras to the boxed cake mix makes this taste like a bakery cake!  Enjoy!

Saturday, February 4, 2012

Fresh Lemon Curd

Lemon Curd
Ingredients
1 Tablespoon grated lemon zest
1/2 cup fresh lemon juice
1 Tablespoon cornstarch
6 Tablespoons unsalted butter
3/4 cup white sugar
4 egg yolks

Directions
In a medium sauce pan, mix together lemon zest, lemon juice, and cornstarch until smooth. Mix in butter and sugar, and bring mixture to a boil over medium heat. Boil for one minute stirring constantly. In small bowl, with a wire whisk, beat egg yolks until smooth. Whisk in a small amount of the hot lemon mixture. Pour the egg mixture into the sauce pan beating the hot lemon mixture rapidly. Reduce heat to low, cook, stirring constantly 5 minutes or until thickened. Pour mixture into medium bowl, place plastic wrap on surface to keep skin from forming as it cools. Cool at room temperature. Put in refrigerator for 3 hours to cool (or freezer for 30 mins-1 hr).

Cherry Chip Cupcakes with Cherry Vanilla Icing

I always make a Valentine's Day treat for Dave.  We were sitting here tonight talking about our upcoming Valentine's tradition of Crab Legs and having dinner at home, and he said, "Remember those cupcakes you made last year?  The cherry ones?  They were amazing, and I was wondering if you could make them again this year."  With a sweet request like that how in the world could I tell this cute little man no?  I love him so much I could just eat him up, but I'll save that for the cupcakes.  

Anyway back to the cupcakes, so unfortunately this is not my recipe, but I have no idea where in the world I got it.  I just know that whomever made it rocks at cupcakes and I want her or him to be my friend.  :)  So if you want to dazzle your man or woman on V-Day this year, aim for her or his stomach and make these!

Ingredients
1 1/2 cups Flour
1 cup Sugar
1 1/2 tsp. Baking Powder
1/2 tsp. Salt
1/2 cup (1 stick) unsalted, room temp. Butter
1/2 cup Sour Cream
2 Eggs, room temp.
2 tsp. PURE Cherry extract
1/2 tsp. Fresh Lemon Zest (this is the ingredient that will make these cupcakes knock your lovers socks off!)
1/2 cup Sweet Cherry Chips (I use Gurleys)
(I also add a little red food coloring to my batter because I think it makes the cupcakes look cute, as you can see)

Directions
Preheat oven to 350

Line a muffin pan with cupcake liners and set aside.
.
In your mixer whisk together flour, sugar, baking powder, and salt.  Mix in butter, sour cream, eggs, cherry extract, and lemon zest.  Mix until well combined, and then fold in with a rubber spatula the cherry chips.

The you're just going to take your cookie scooper or just use a Tbs. and put 3 Tbs. in each one of your liners.

Bake for 20-22 minutes or until an inserted toothpick comes out clean.  You want to make sure you take them out before they start to go golden brown on the top.  Then let cool completely before icing.

Cherry Vanilla Buttercream Icing
Ingredients
1 stick unsalted Butter
1/2 lb. Powdered Sugar
1-2 tsp. Pure Cherry Extract
1 tsp. Vanilla extract
1/2 tsp. Lemon Juice
1/4 tsp. Salt
2 Tbs. Heavy Cream

Directions
Mix all ingredients together in a mixer and add a little food coloring if so desired.  Frost your cuppy cakes!

Monday, January 30, 2012

Valentine's 2012

I have my girlfriends, sister, nieces, and mom that I do Valentine's day gifts for and this year I'm into mason jar gifts.  I wanted to show you what I'm doing to give you an idea and start getting those creative juices going.  the first

1. Cookies in a Mason Jar
Bake up your favorite cookie and then in the short and fat mason jars fill up with a couple and they decorate.  Get a white and re fabric and hot glue to the top, and add a bunch of red, pink, and white ribbon, and had a little tag from you.  Here's my example.
So easy and so fun!  I promise your friend will love it.  Another idea if you don't want to back.  Get a pair of V-Day socks, some chapstick, yummy lotion, and some peppermint oil maybe a puma stone and that makes a great gift!  Anything in a mason chair this year is big and you can make it look soo cute!


2.  Cake in a Mason Jar
Make your favorite cake, add a little in once it's cooked, add a little frosting, and then add more cake.  Close it up and add your cute note and ribbons.


My last Valentine's idea is
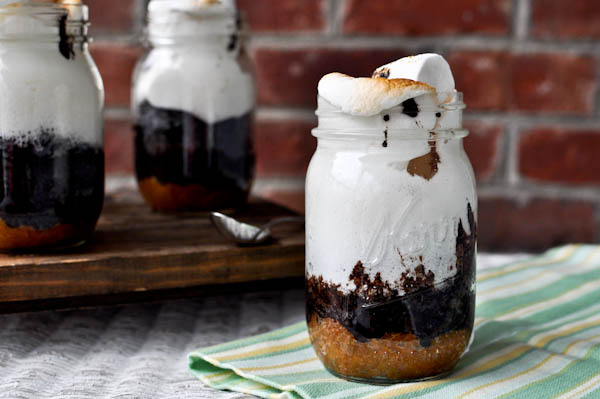
3. Smores in a Mason jar from a darling little site I cam across 
http://www.howsweeteats.com/2011/04/smores-cake-in-a-jar/
S’mores Cake in a Jar
makes 4 16-ounce mason jar cakes
for crust:
1 1/2 cups graham cracker crumbs
1/2 stick butter
pinch of salt
Preheat oven to 350 degrees.
Melt butter and mix in graham crumbs and salt. Mix until moistened. Spray 4 mason jars with non-stick spray and press graham crust into jars. I began by adding a tablespoon to each, and repeating until graham crumbs were gone. They don’t need to look perfect. I pressed the crumbs down firmly with the flat bottom of a clean screwdriver.

1 1/8 cups all purpose flour
1/4 cup dark cocoa powder
1 1/4 teaspoon baking soda
1/2 teaspoon salt
3/4 cup brown sugar
1 egg
1 teaspoon vanilla extract
1/2 cup milk
1/2 cup + 1 tablespoon heavy cream
1/2 cup butter, melted
2 tablespoons sour cream
for topping:
1 bag of large marshmallows
In a bowl, whisk egg and sugar until smooth and no lumps remain. Add milk, cream, butter and vanilla, and mix until combined. Stir in sour cream. Sift dry ingredients together and add to wet mixture. Mix until batter is smooth. Using a 1/4 cup measure, add batter to mason jars one scoop at a time. You only want to fill them up about half way, and the batter should work evenly for 4 jars. Again – don’t worry if it is perfect. Place mason jars in a baking dish and add about 1 1/2 cups of water to the bottom. Bake for 30 minutes, or until cake is set.
Remove cake from the oven and press large marshmallows down on top, being careful not to burn yourself. There is no set number of marshmallows to use, I pressed down as many as I could, about 4-5 each. Heat the broiler on your oven and watching carefully, brown marshmallows for about 1-2 minutes, or until golden brown. Do not take your eyes off them! Serve immediately.

So there you do everyone!  This Valentine's you decorate that Mason Jar, and add something yummy, and all those girls in your life, and hubby/boy is going to love it too!  Here are so fun ideas.  Happy Valentine's Day!

Sunday, January 15, 2012

Vanilla-Vanilla Cupcake

This recipe is for those people that love moist cupcakes that explode with Vanilla flavor.  I'm a huge cupcake girl, but I'm not a chocolate girl.  Vanilla is my favorite cupcake and so I tried and failed at so many attempts to make a delicious and moist recipe for cupcakes.  This recipe will knock your Vanilla sweet tooth socks off!  You will be craving these all the time, and probably make them even more.  Here you go Vanilla Lovers!
Ingredients
1 cup Sugar
1 Vanilla Bean
1 3/4 cups Flour
1 1/2 tsp. Baking Powder
1/2 tsp. Baking Soda
1/2 tsp. Salt
1/4 cup Butter
2 large Eggs
1/3 cup Sour Cream (full fat)
1/4 cup Canola Oil
1 Tbs. Pure Vanilla Extract
2/3 cup Whole Milk

Directions
Preheat oven to 350 degrees.  
Combine Sugar, butter, and the seeds from the vanilla bean.  Stir with the back of spoon to break up any stuck vanilla seeds.  Set aside.
In a mixing bowl combine flour, salt, baking soda, and baking powder. Slowly mix in the sugar on low speed just until combined.
In a separate bowl whisk together eggs, sour cream, vanilla, and oil until smooth.
Slowly pour the egg mixture into the flour mixture and mix on medium speed until just combined.

Slowly pour in the milk.  This will turn your batter runny almost a liquid which is what you want.  
Pour a little over 1/2 into each cupcake liner.  Cook for 14 minutes and then check with a toothpick to make sure they're done.  If the cupcakes aren't done (the toothpick isn't clean) cook for 2 more minutes.  You don't want your cupcakes golden brown, you want them a cream color with specks of Vanilla showing through.
Remove your cupcakes immediately from the pan and cool on a cooling rack or on your counter.  Once they are completely cooled, you can frost them with my delicious Vanilla Buttercream Frosting (the recipe is below).  Enjoy!

Vanilla Buttercream Frosting
2 sticks of unsalted Butter
6-8 cups Powdered Sugar
1/2 cup Milk
2 tsp. Vanilla

Directions
In a mixing bowl combine all the ingredients and mix until everything is combined.  You can leave it white or add food coloring to make the color you want.  So much fun!

Saturday, November 26, 2011

Thanksgiving Stories

Hi everyone!  I hope you all had an amazing Thanksgiving!  Ours was great!  I had so much fun cooking, I think I could have done it twice!  The dinner turned out great, beautiful, and delicious.  It was wonderful spending time with my husband and family.  There is nothing better in this world then eating and spending time with the ones you love.

I want to hear all about your Thanksgiving stories though!  Your traditions, what you had to eat, even share some recipes if you want!  Here is a list of the things I made, and just a few pictures from off my phone of the dinner.  (I forgot to take a picture of the Turkey, but I will be making another one this week, so I'll show you what it looks like then! And I obviously didn't have my regular camera, we were working with an old cell phone hehehe)

Homemade Clover Rolls

Me, just cooking away

My homemade cranberry recipe that I made up that day.  It was a HIT!

Pumpkin Crunch cake...mmmmm.

The star of the party in my mind, the Candied Yams

Papa Kirk (my Dad) The Gravy Chef

I know it's not a Turkey, but man was it delicious!

And what the yams look like before the Marshmallows

Sunday, October 30, 2011

Pumpkin Crunch Cake

This is one of my favorite family recipes.  I look forward to Thanksgiving every year because I know that we are going to be getting this cake.  I personally am not a big pie person, but give me a good, moist, dense, piece of cake any day and I'll be happy!  

One pie I do like is Pumpkin, but like I said, cake is better, so when I was little and my Mom came up with this recipe just for me I was in heaven.  It brought 2 of my favorites together.  Pumpkin and cake.  Delish!  
 Ingredients
1 15oz can of Pumpkin
1 12oz. can Evaporated Milk
3 Eggs
1 1/2 cups Sugar
1 tsp. Cinnamon
1/2 tsp. Salt
1 box Yellow Cake mix
1 cup roughly chopped Pecans
1 cup Butter melted
Homemade Sweet Whipped Cream

Directions
Preheat oven to 350 degrees.  Combine pumpkin, evaporated milk, eggs, sugar, cinnamon, and salt in a mixer.  Mix on medium speed until well combined.  Pour batter into a greased 13×9 baking dish.

Run cake mix through a sifter to get lumps out and sprinkle dry cake mix evenly over pumpkin mixture.  Top with pecans.  Drizzle melted butter over pecans.

Bake for 50-55 minutes or until golden brown.  Cool. Serve chilled (or warm).  Top with  a dollop of Sweet Whipped Cream.  Enjoy!!

Saturday, October 29, 2011

Hot Milk Cake

One of my favorite food blogs to follow is Flour Me with Love.  Her recipes are to die for, and really easy.  I had to steal this one from her today, because it's the perfect cake recipe!  I woke up this morning and saw the recipe, so I made the cake for breakfast and it was delicious.  It was warm and light and sweet and so nummy!  Since it was nummy, it was the perfect recipe for my blog...so here you go!


Ingredients are as follows: 

4 eggs
2 C sugar
2 1/4 C flour
2 1/4 tsp. baking powder
1 tsp. vanilla
1 1/4 C milk
2/3 C butter 

Directions


Preheat oven to 350 degrees; Grease a bundt pan.


Beat eggs until thick, about five minutes.

Add sugar and beat until light and fluffy.
Add flour, baking powder and vanilla.  Mix until incorporated.

Heat milk & butter in a saucepan over medium heat; until butter melts.

By hand, slowly stir milk mixture into the batter;  mix thoroughly.

Pour into prepared pan.

Bake for 35-40 minutes or until golden brown.  

Allow to cool for ten minutes, remove from pan (sprinkle on some powdered sugar if desired).

Slice, serve and enjoy!


Wednesday, October 19, 2011

Mom's Poppy Seed Cake

My Mom made this at least twice a month growing up.  I absolutely loved it!  That really isn't saying much because I was 302 lbs. at one time in my life, and I really enjoyed just about any food you put in front of me.  That being said, I promise this is delicious and yummy!  It's cinnamon and sugar crisp texture on the outside of the cake makes it to die for!  One bite and you'll be hooked!  Try to not eat the entire thing after the 1st piece!

Ingredients 
1 box Yellow Cake Mix
1/2 cup Vegetable Oil
1 cup water
4 Eggs
1 small pkg. instant Vanilla Pudding
3 Tbsp. Poppy Seed
Cinnamon and Sugar

Directions
Preheat oven to 375 degrees.

Mix all ingredients on low for 15 min. 

While the cake is mixing, you are going to mix your cinnamon and sugar.  I normally use 1/2 cup of sugar, to about 3 Tbsp. of Cinnamon.  You want the consistency of what you would put on toast.  Then you grease a Bundt pan and dump the cinnamon and sugar inside.  You're going to work the cinnamon and sugar around the pan (like you would dust a pan with flour) until all the grease is completely covered, thus your pan is completely covered in cinnamon and sugar.

After the cake has mixed in your mixer for 15 min. dump it into your bundt pan.  Place a 9x13 cookie sheet on the rack in your oven below the one the cake will be sitting on.  Then place your cake in the oven.  Bake for 45 minutes. 

Remove from oven and let sit for about 5-8 min. before dumping the cake upside down out of the pan onto a cooling rack.  Let cool (if you can) or just eat it up.  Enjoy!!

Sunday, October 16, 2011

Candy Corn Cupcake

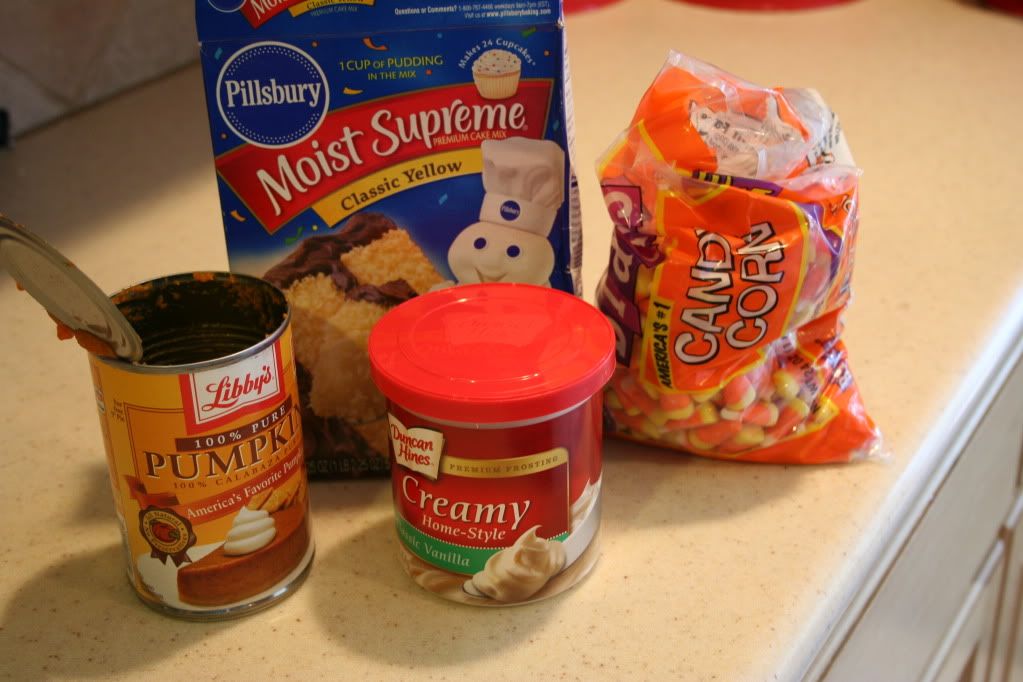
This is one of those "so simple its silly" sort of recipes! I found this fun recipe while pinteresting today! I found the pumpkin cupcake recipe here and the idea for the decorative candy corn center here.

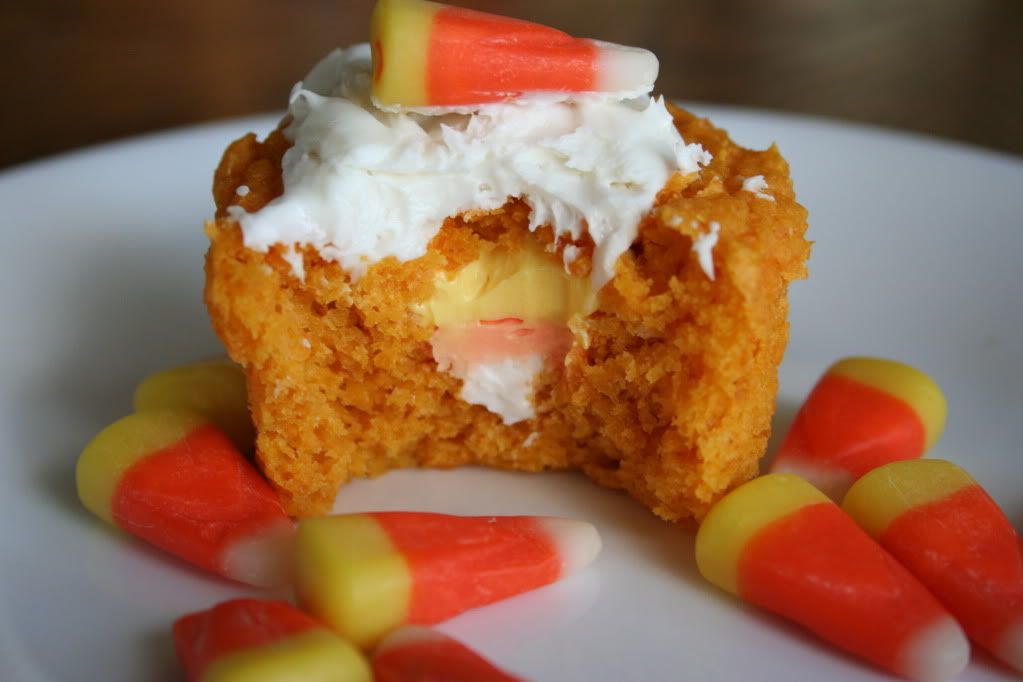
See how there is a little frosting candy corn inside?! Its so cute! A surprise center is perfect for halloween!
Best of all- Only just a few ingredients needed!


First for the cupcakes.
It ONLY takes the can of pumpkin and the white cake mix.
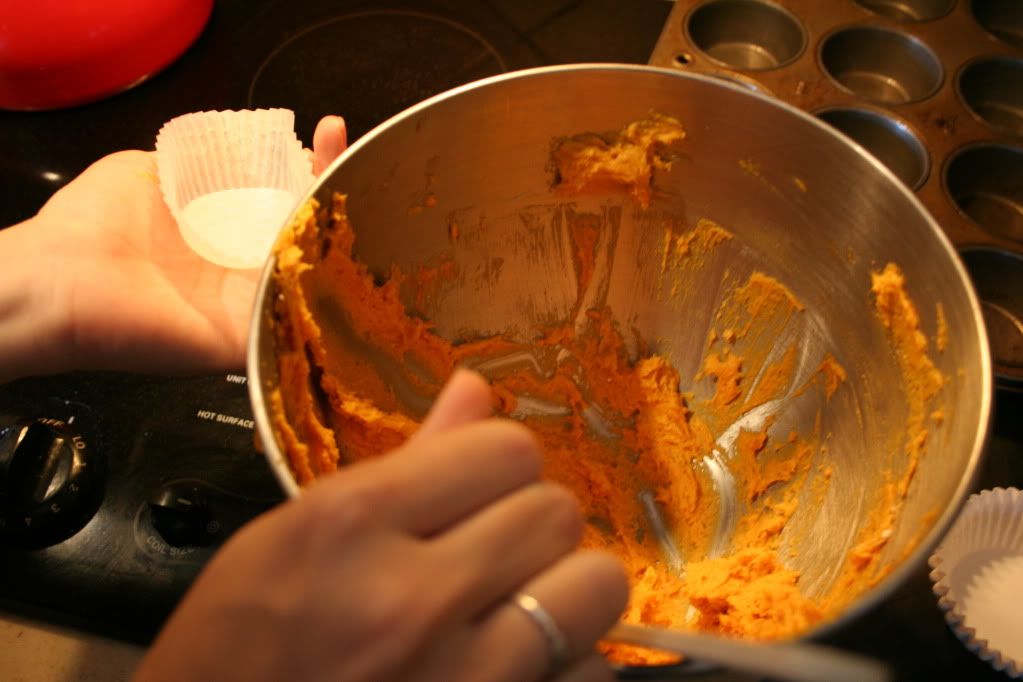
Thats right, nothing else. None of the other things like oil or eggs that you would normally add!  Just mix the two together, then spoon it into cupcake liners.

If you can shake it around, and make them a bit less lumpy, that way the thickness wont affect the overall outcome.
Yes it does a bit like baby food at this point.
Now after baking it for the same time as the box. Let it cool....all the way! It is VERY moist, so you don't want it to fall apart when you cut into it.
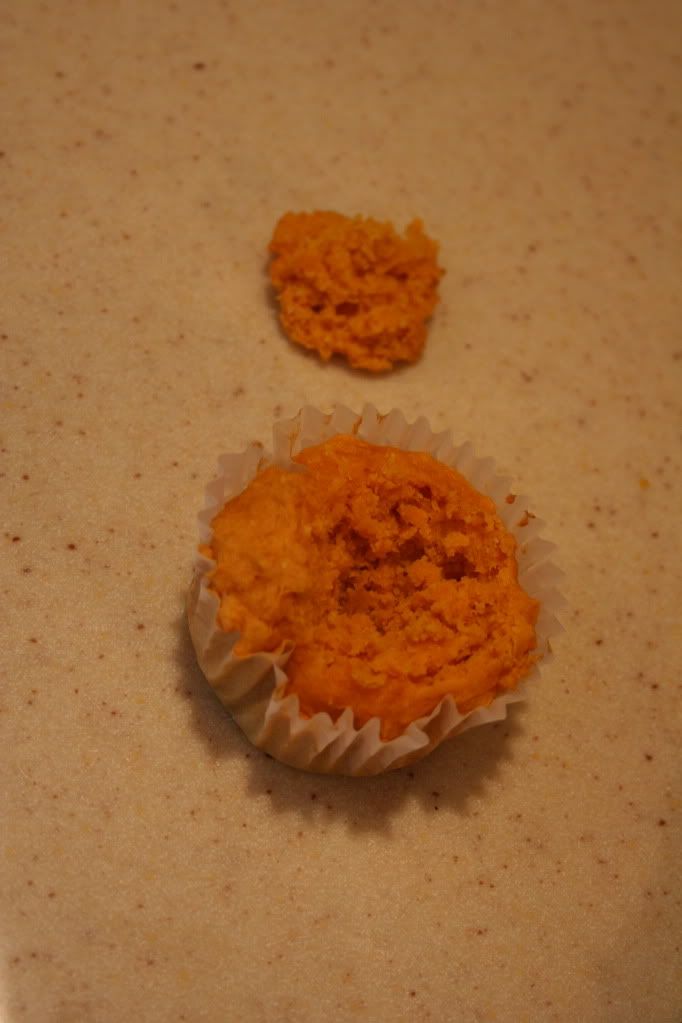
Then get a sharp knife, and cut into the cupcake at an angle.

Then fill it up with colored frosting! White on the bottom, orange, then yellow! I used plastic bags with the tips cut off to pipe it into the cupcake. (I got so into it...I forgot a picture.)

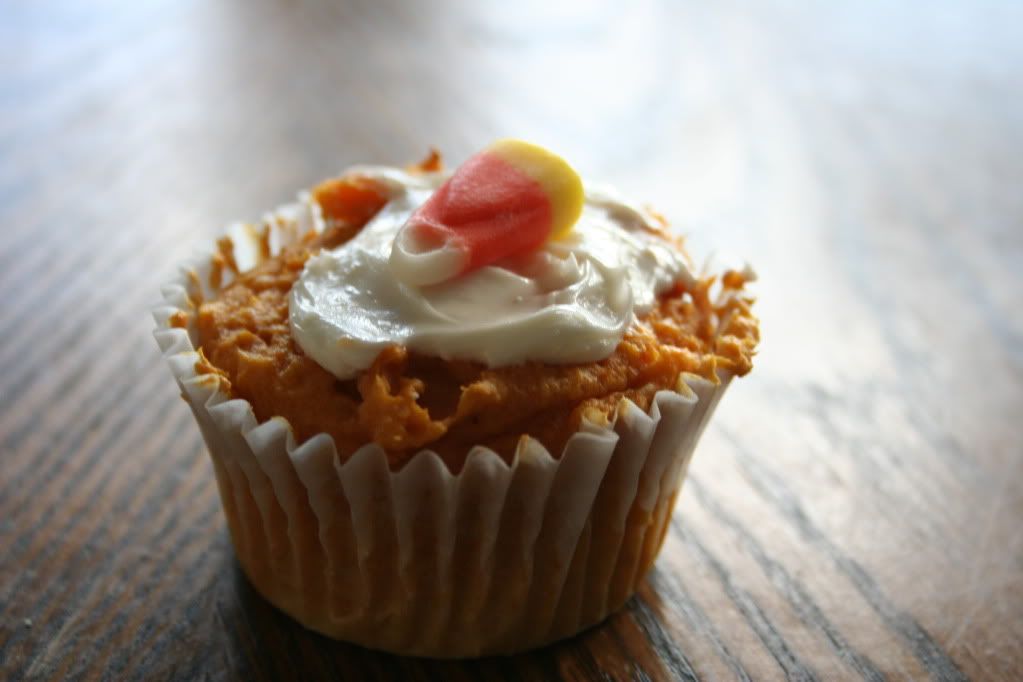
Put the top back on (cut off a bit of the bottom piece, to make it fit on there right) then put a smidgen of frosting on the top (to cover up where you cut the top off). You don't need much...you must remember it is filled with frosting!
Then add a candy corn- so everyone knows it is special!


 Happy Halloween!!

Wednesday, October 12, 2011

Coffee Cake in a Mug

I love coffee cake!  I make it every time Dave doesn't have school as his special breakfast, but there are some mornings where I just want it and don't want to make a huge pan.  I came up with this brilliant idea to make a coffee cake, in a coffee mug, in the microwave!  Yay!  So here is the recipe, and now you can have your coffee and eat your cake too!

Directions
Well, first you'll need a cup. If you want it to puff up over the top of the cup, use a small one. Or if you want to dig into the cup, use a big one. It matters not.


Add a tablespoon of butter.


Soften it in the microwave for 10-15 seconds. Don't melt, just soften.


Stir in 2 tablespoons of sugar until it's fluffy and creamy, maybe 30 seconds.


Now you can add some egg. you don't have to, but without egg it's more crumbly and less cake-y. You can do a whole egg, but I like to break the egg into a ramekin and stir it up, then split it between two cups of coffee cake, or just use half for one coffee cake. But really, play it by ear. Try it out and see what tastes best to you.


Then stir in 2 tablespoons of sour cream and a few drops of vanilla. We're talking droplets here, don't add too much.


Stir in 1/4 cup of flour and 1/8 teaspoon baking poweder.


If you want some crumb topping (you know you do), in a separate ramekin or bowl add 1 tablespoon butter, 2 tablespoons flour, 1 tablespoon of brown sugar, and 1 teaspoon of cinnamon.


Smoosh it together with your fingers for a few.


Now back to your cup. Your ingredients are all mixed up, so...


Add the crumb topping mixture to the cup...


Then microwave it. Start with 1 minute, then do 10 seconds more until it's done to your liking. For my microwave, a minute 20 seconds does it perfectly.


It will be REALLY HOT when you take it out of the microwave.


Let it cool down for a few seconds, then dig in.


This is basically a start for a quick microwave coffee cake in a cup recipe, you can adjust to your own tastes and liking, since this is a serving for one after all. I like it just like this, but my husband doesn't mind it without the egg. You may want more of this or less of that to suit your tastes. I look forward to hearing any adjustments you make and finding out if cake in a cup seems worth it to you. Enjoy!